Jio DLT Registeration - How to do JIO DLT Registration Process Online
Jio DLT Registration process Online
Here we have provided the steps for signup in Jio DLT /DLT registration process in Jio. Follow the steps in order to register yourself easily.
- Firstly open the link – https://trueconnect.jio.com
- A page will open in front of you here click on the register now button in order to register as an entity in the Jio DLT platform.

Now the second page will open, here you will have to click on the principal entity option.

After this, if you are already registered as a principal entity click on yes, and if you’re not then click on no. After clicking on fill in the requested details. This will include authorized contact person, organization name, organization category, PAN/TAN, KYC document type, KYC document number, email ID, etc.
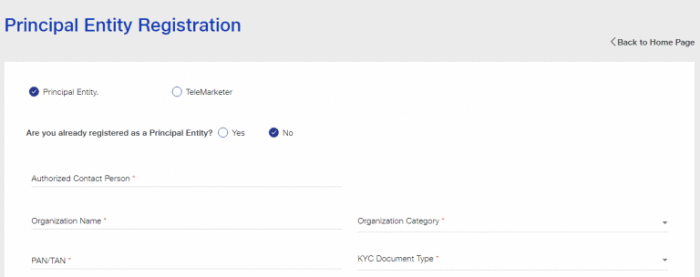
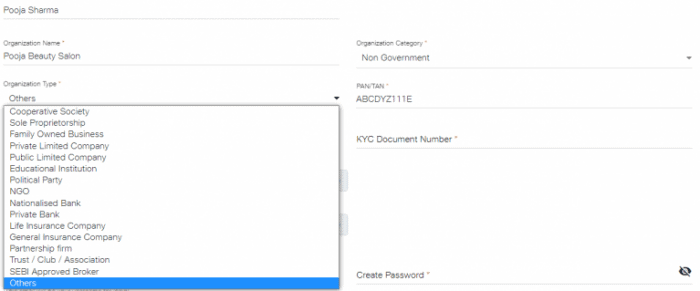
Enter all the details as shown in the below-given image. Select your organization type from the drop-down list.
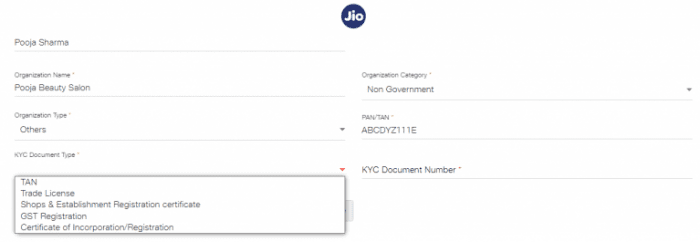
Select the type of your KYC document from the list and enter the KYC document number as well.
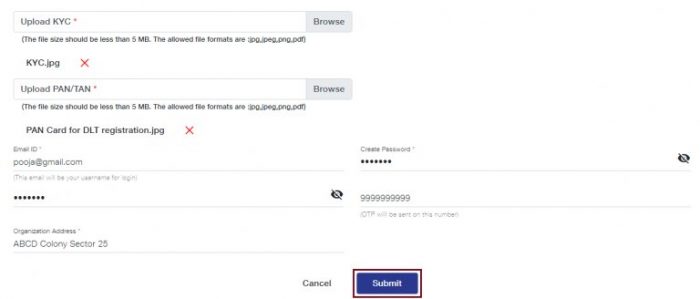
Now upload your KYC document and pan card. The size should be less than 5 mb.
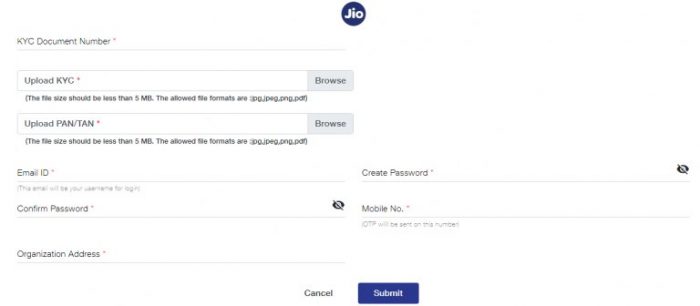
After this enter your email ID, create a password, mobile number, and organization address, and finally click on submit button.
JIO dlt Registration Process
Visit the link: https://trueconnect.jio.com
Step 1: Click on the Register Now button to register as an Entity in the Jio DLT platform.
In the following page select the Principal Entity option.
Step 2: If you are registering on the DLT platform for the first time, select No & Fill the requested details..
Step 3: Select your Organization Type from the drop down list.
Step 4: Select the KYC Document Type from the drop down list and enter the KYC Document Number.
Step 5: Upload your KYC Document and PAN/TAN. Make sure the file size is less than 5 MB.
Step 6: After uploading KYC document and PAN Card. Next, enter your email ID, password, mobile number and organization address. After providing the details, click on the Submit button.
Step 7: As you click on the Submit button, an OTP will be sent to your registered mobile number. Enter the OTP received to complete the mobile number verification.
Step 8: Once your Mobile number verified then next will go for billing page. Once you processed the payment of Rs 5900/- and click on the Submit button.
Step 9: Once u Submitted an email will be sent by Jio that your Entity registration request has been received and is being processed. After submitting registration request, you need to wait for 2-3 days for its approval.
Once your entity gets approved, an email will be sent by Jio as shown in the image below. You will receive your login details and Entity Number on your registered email ID.
Now, you can login and access your JIO DLT account.


